dim_STAT is a tool for both high-level and detailed, monitoring and performance analysis of Solaris, Linux, and other UNIX systems.
The main features of dim_STAT are:
- A web based user interface
- All collected data is saved in a database
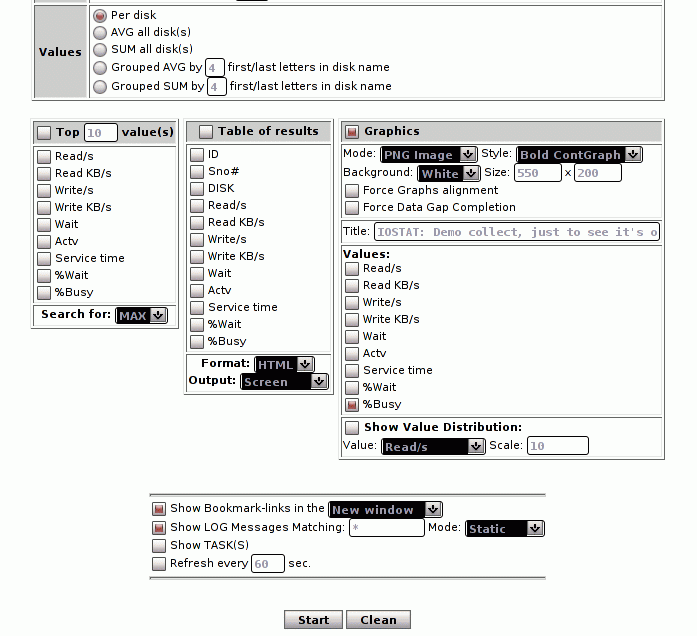
- Multiple data views
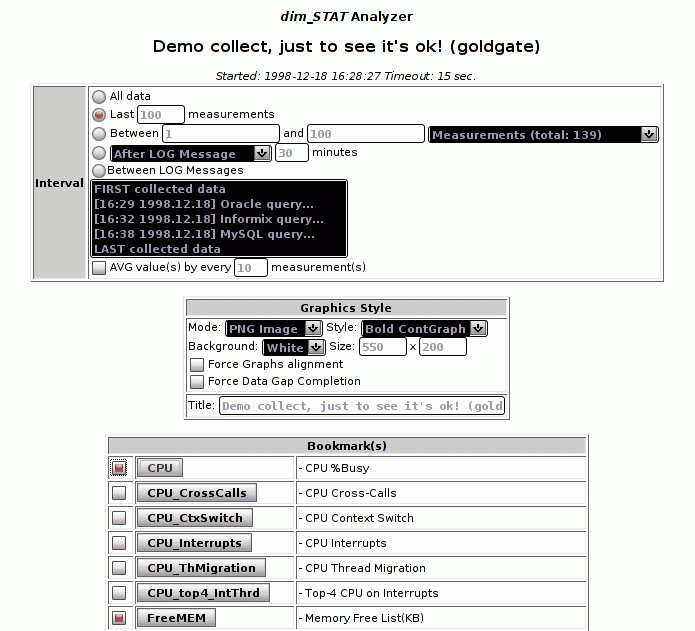
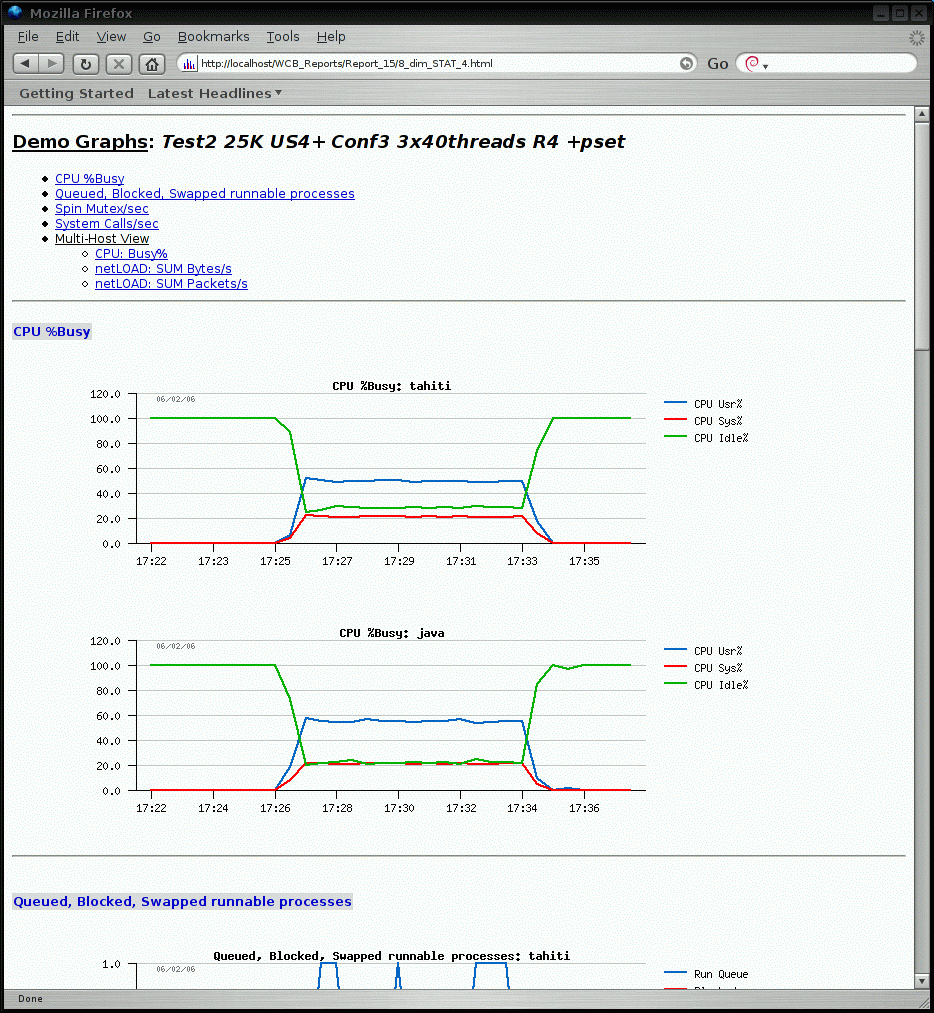
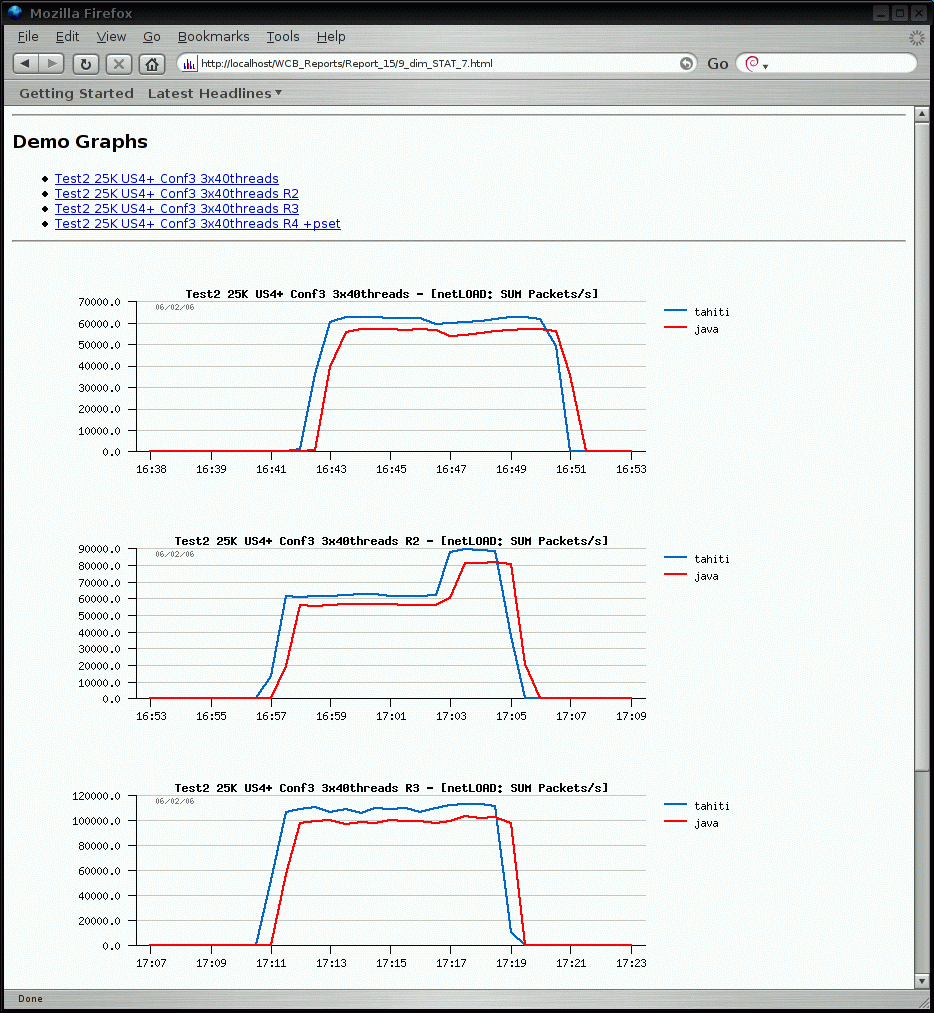
- Interactive (Java) or static graphs (PNG)
- Real Time monitoring
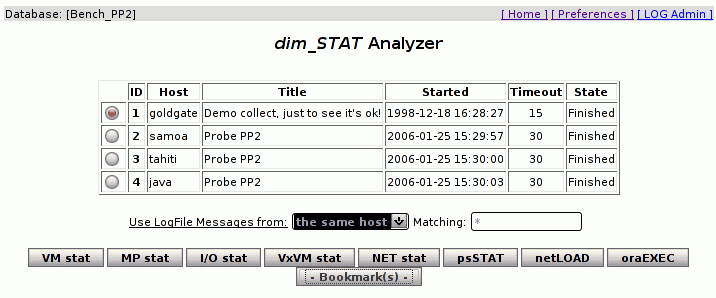
- Multi-Host monitoring
- Post analyzing
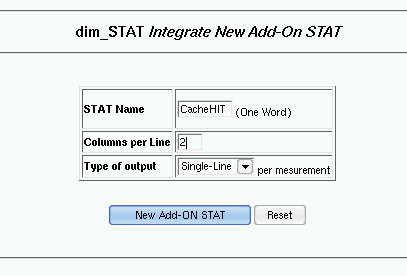
- Statistics integration (Add-On)
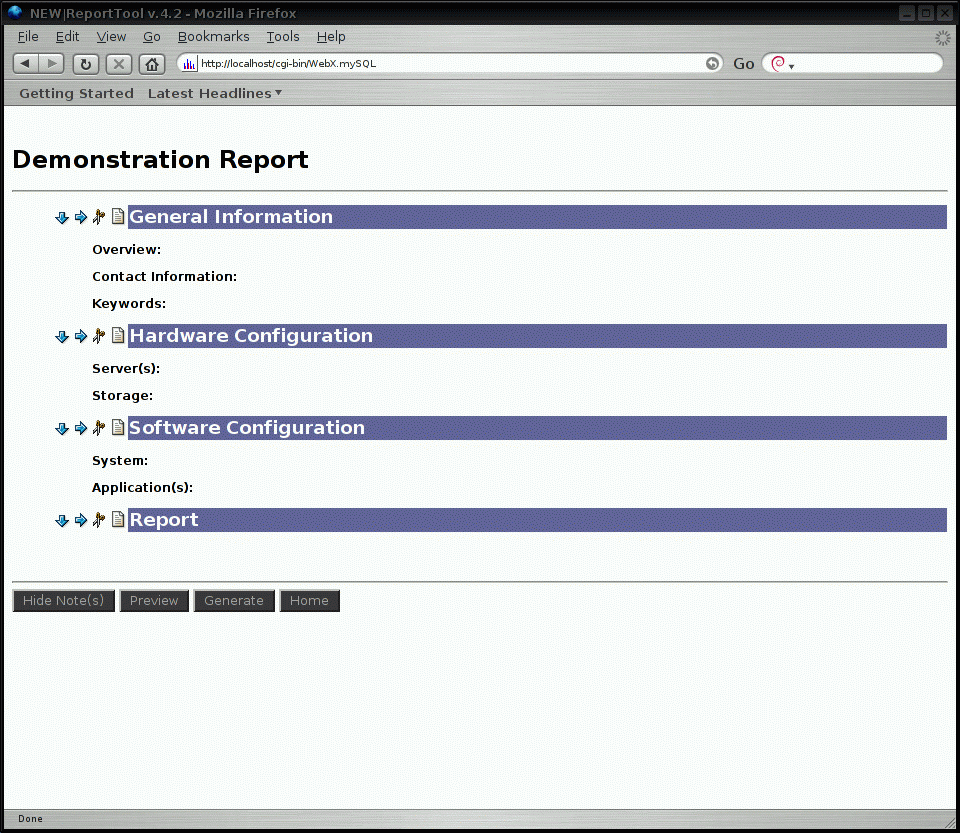
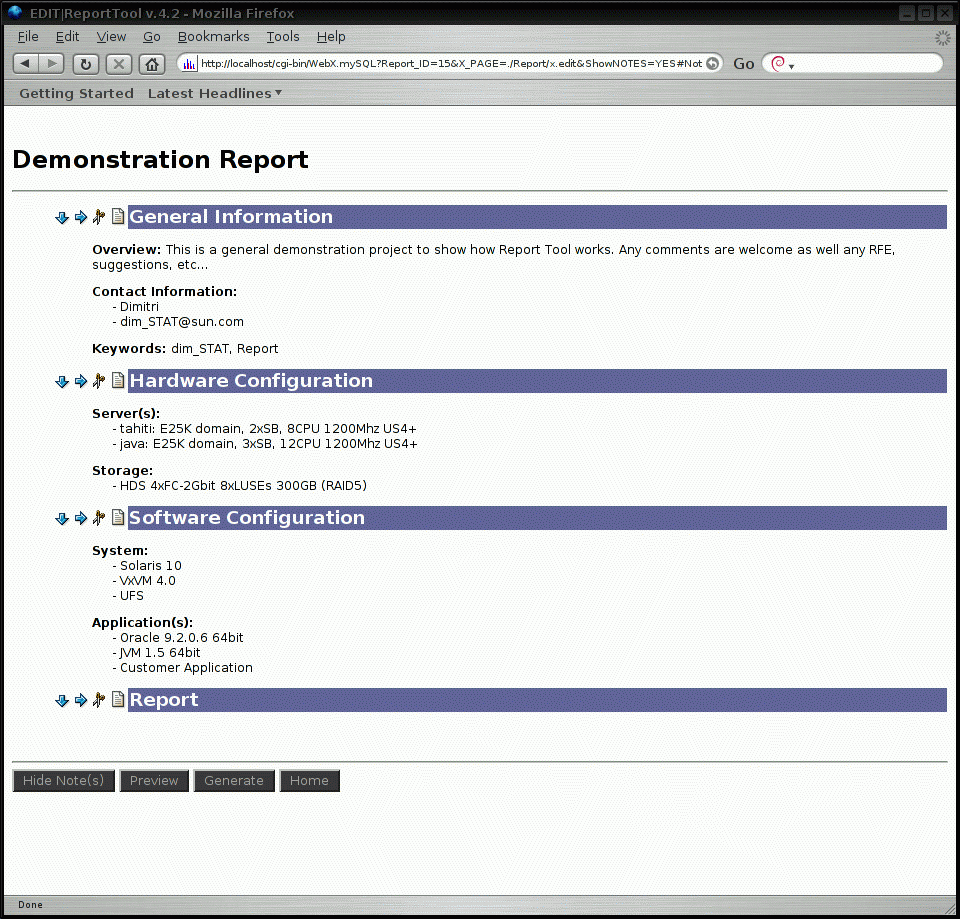
- Professional reporting with automated features
- One-click STAT-Bookmarks
- etc.
All STAT data is collected from standard UNIX tools like vmstat, iostat, etc. (or some special ones, like psSTAT for monitoring users and processes activity)
and saved in the MySQL database. Collected data is accessed via a web
interface and can be presented in several manners (interactive or static graphs,
text, HTML tables). Since v.8.1 there is also a way to collect data from other UNIX systems (HP/UX, AIX, MacOSX, etc.)
dim_STAT can be used for the on-line monitoring of one or several hosts at the same
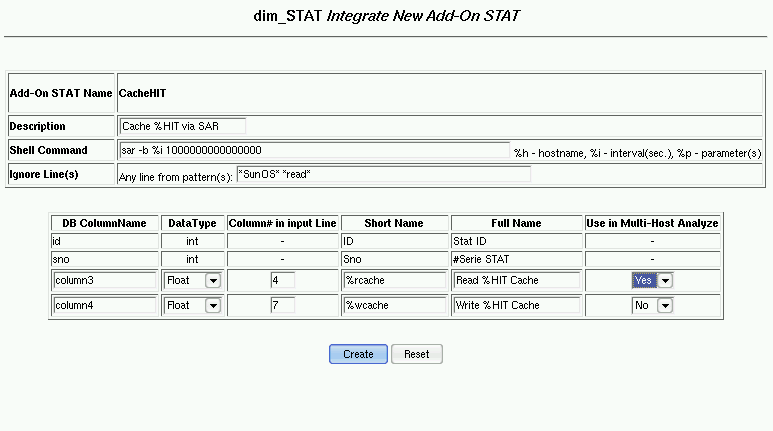
time. As well, data can be post loaded from output files of stat commands and analyzed in the same manner. At any time data collection from new stat commands can be added to the tool (via Add-On interface) to enlarge your view on application workloads, RDBMS, your personal STAT program, etc.
By default, dim_STAT interfaces with the following Solaris stats (SPARC and x86):
- vmstat
- mpstat
- iostat
- netstat
- psSTAT, ProcLOAD, UserLOAD (processes an users)
- ZoneLOAD, PoolLOAD, ProjLOAD, TaskLOAD (CPU/memory/etc. load per zone/pool/project/task (Solaris 10))
- netLOAD (extended network stats)
- UDPstats (UDP traffic)
- IOpatt (Solaris 10 I/O pattern via DTrace)
- vxstat (VxVM stats)
as well as the following Add-On extensions for both Solaris SPARC/x86 and/or Linux/x86:
- CoreSTAT (Solaris)
- MEMSTAT (Solaris)
- HAR v2 (Solaris CPU chip counters for SPARC and x64)
- jvmSTAT (Java VM GC Activity and Memory Usage stats)
- oraEXEC, oraIO, oraSLEEP, oraENQ, oraASMIO (Oracle activity stats)
- mysqlSTAT, mysqlLOAD, innodbSTAT, innodbMUTEX, innodbMETRICS (MySQL & InnoDB activity stats)
- pgsqlSTAT, pgsqlLOAD (PostgreSQL activity stats)
- LvmSTAT (Linux vmstat)
- LcpuSTAT (Linux mpstat)
- Lmpstat (Linux mpstat v2)
- LioSTAT (Linux iostat)
- LnetLOAD (Linux netLOAD)
- LpsSTAT (Linux psSTAT)
- LprcLOAD (Linux ProcLOAD)
- LusrLOAD (Linux UserLOAD)
- IObench (tool for I/O stress load)
- dbSTRESS (tool for database stress load)
- OSXiostat, OSXvmstat, OSXnetstat (experimental MacOSX support was added since v.9.0)
- and mostly any other program you want to add...
The CPU utilization of dim_STAT during collect is very low and even less than
standard tools like top or perfbar.
Before starting any STAT collect, first check if the STAT-service is running on every server you want to monitor. This is the most common error!!
Another point, if you want to monitor a Linux server, be sure you've installed the Linux STAT Add-Ons, before starting any collect (see the special Linux section in this document).
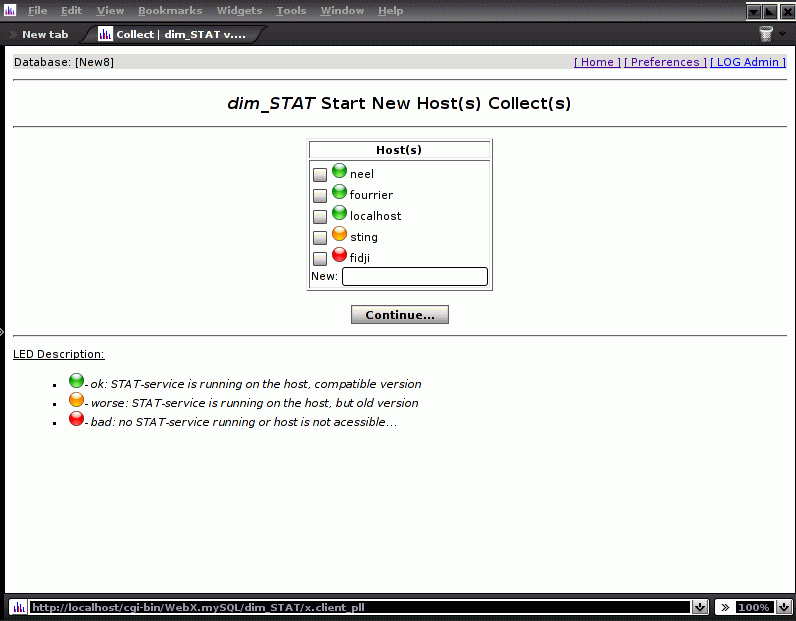
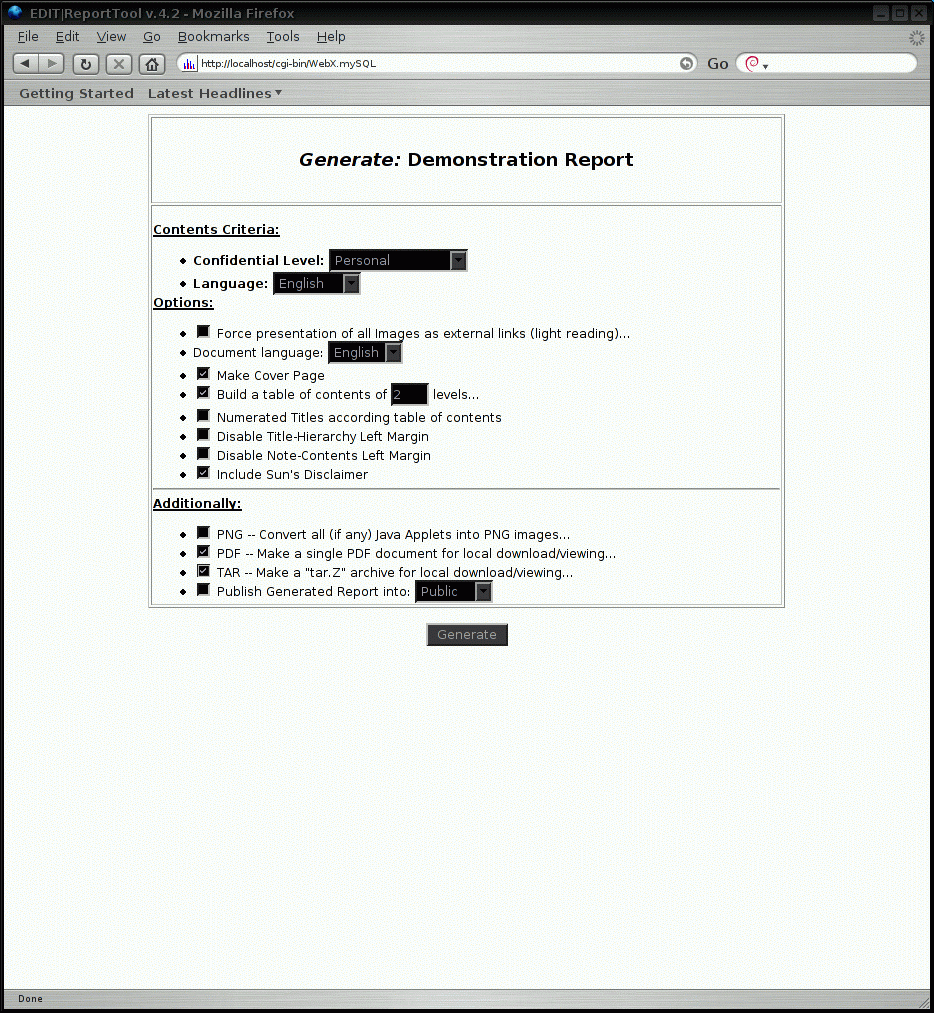
Now, from the dim_STAT Main Page you may just follow the Start New Collect link. (Note: since version 8.0 there is no distinction anymore between single and multi host collect).
IMPORTANT:
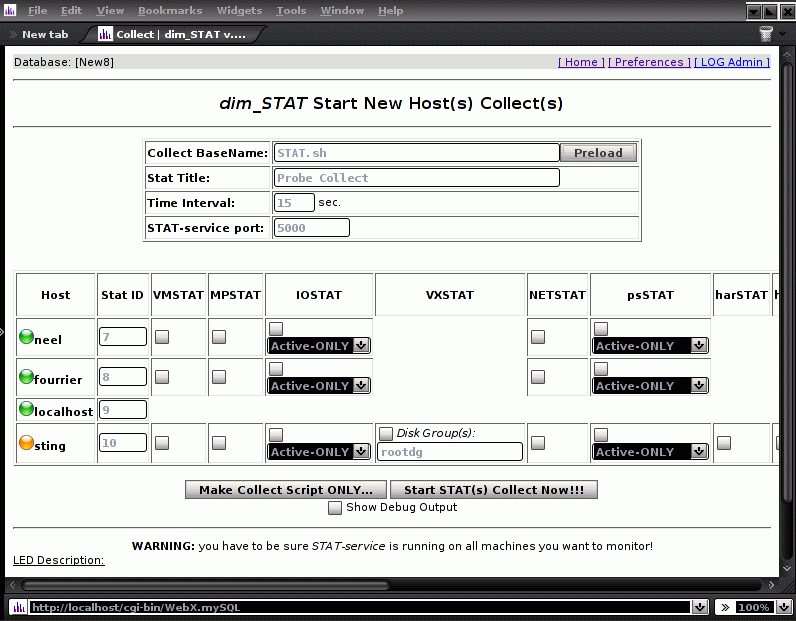
- A STAT collect for a host is independent of any other, so it can be stopped and/or restarted at any time, independent of other collects.
- Your collect options saved into special script files with a name based on the "Collect Base Name". Using customized names you may pre-load a different set of options, according to your needs.
- You may start a collect on-line from your browser, or you can make a start script, to be run by hand, via cron, as a batch job, etc.
The idea for BatchLOAD came (as many things) from day to day needs. Sometimes you are facing customers/users who want to know what happens on their machines, but then they don't allow the installation of any additional software (a very constructive approach :-)).
All you can do now is to ask them to run some stat commands on their systems and send you the output files. While loading their files every day via the Web interface, you start to think harder and harder if there isn't a way to do this automatically. Are you ready for BatchLOAD??
I decided to add a new component to dim_STAT, but I kept in mind that other tools already exist that are collecting output from stat commands. All these tools are keeping data in their own format, so I've tried to design the input format for BatchLOAD to be easily adaptable.
Of course, I didn't think to create something universal :)), but I hope it shouldn't be too hard to write a script that can convert from an existing format into BatchLOAD.
Some words about the internals of BatchLOAD. There is no dependency on the name of loaded files. All needed information is given by command options and in the contents of the loaded file. The loaded file must have special TAGs. At least two: to give the STAT name and to confirm the END.
USAGE:
Usage: /apps/ADMIN/BatchLOAD -cmd NEW/ADD options


    Options [NEW]:        -- force new collect creation
       -base DBname       -- database name
       -ID id             -- Collect ID, if 0 use max+1 id automatically
       -title Title       -- Collect Title
       -host Hostname     -- Collect Host Name
       -isec sec          -- Collect STATs Interval (sec)
       -start datetime    -- Collect Start DateTime in format YYYYMMDDHHMISS
       -skip1 yes/no      -- Yes/No skip first STAT measurement (often wrong values)
       -file Filename     -- Full path to file with STATs outputs
       -verbose on/off    -- verbose output on/off


    Options [ADD]:        -- add to existing collect whenever possible
       -base DBname       -- database name
       -host Hostname     -- Collect Host Name (optional)
       -ID id             -- Collect ID, if 0 :
                             -- if host is given - use max id used by host
                             -- otherwise, use max (last) id automatically
       -skip1 yes/no      -- Yes/No skip first STAT measurement (often wrong values)
       -file Filename     -- File with STATs outputs
       -verbose on/off    -- verbose output on/off
Example :
$ /apps/ADMIN/BatchLOAD -cmd NEW -ID 0 -base ANT -file `pwd`/vmstat.out -skip1 no -title "Test BatchLOAD" -host V880 -isec 20 -start 20031024100000
$ /apps/ADMIN/BatchLOAD -cmd ADD -ID 0 -base ANT -file `pwd`/iostat.out -skip1 no
$ /apps/ADMIN/BatchLOAD -cmd ADD -ID 0 -base ANT -file `pwd`/mpstat.out -skip1 no -verbose on
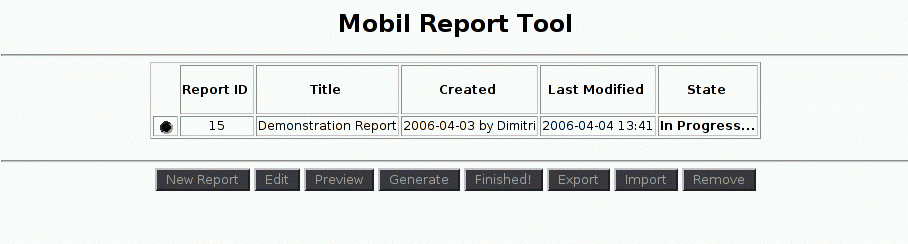
In this example the first line will create a new STAT Collect using an automatic
new ID (max+1), with the title "Test BatchLOAD" and it will load the first file: "vmstat.out"
The second and third lines load into the new Collect the next data, "iostat.out"
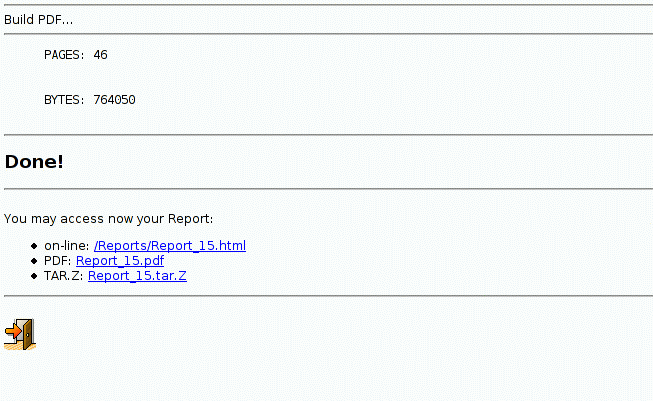
and "mpstat.out". Once it is finished, we can connect to the dim_STAT web server
and start to analyze.
Note : multiple "-file" options can be used at the same time. For example:
$ /apps/ADMIN/BatchLOAD -cmd NEW -ID 0 -base ANT -skip1 no -title "Test BatchLOAD"
        -host V880 -isec 20 -start 20031024100000 -file `pwd`/vmstat.out
        -file `pwd`/mpstat.out -file `pwd`/iostat.out
File Format of STAT output
The file format is designed in such a way as to give maximum flexibility on data grouping and processing.
The main TAGs are STAT and END:
==> STAT StatName                  -- after this point all following data corresponds
                                      to given STAT command (StatName)
    Supported STAT names:
        VMSTAT
        MPSTAT
        IOSTAT (iostat -x)
        IOSTAT-xn (iostat -xn)
        VXSTAT (vxstat -v)
        psSTAT


    And all other Add-On STAT you are able to create,
    like some already shipped:


        netLOAD
        T3stat
        oraEXEC
        oraIO
        ...

==> END                            -- end of STAT data
At any time the following TAGs may also be inserted:
==> DTSET yyyy-mm-dd hh:mi:ss      -- set date+time point for next STAT data

==> LOGMSG message                 -- add log message into database corresponding
                                      to the currently loading data
Outside of the "STAT" - "END" blocks, any other lines are ignored.
Note : TAGs are exactly as it shown: "==> STAT", "==> END", "==> DTSET", "==> LOGMSG". Don't miss any characters!